Posts in Recipes
Spring Time Asparagus Soup

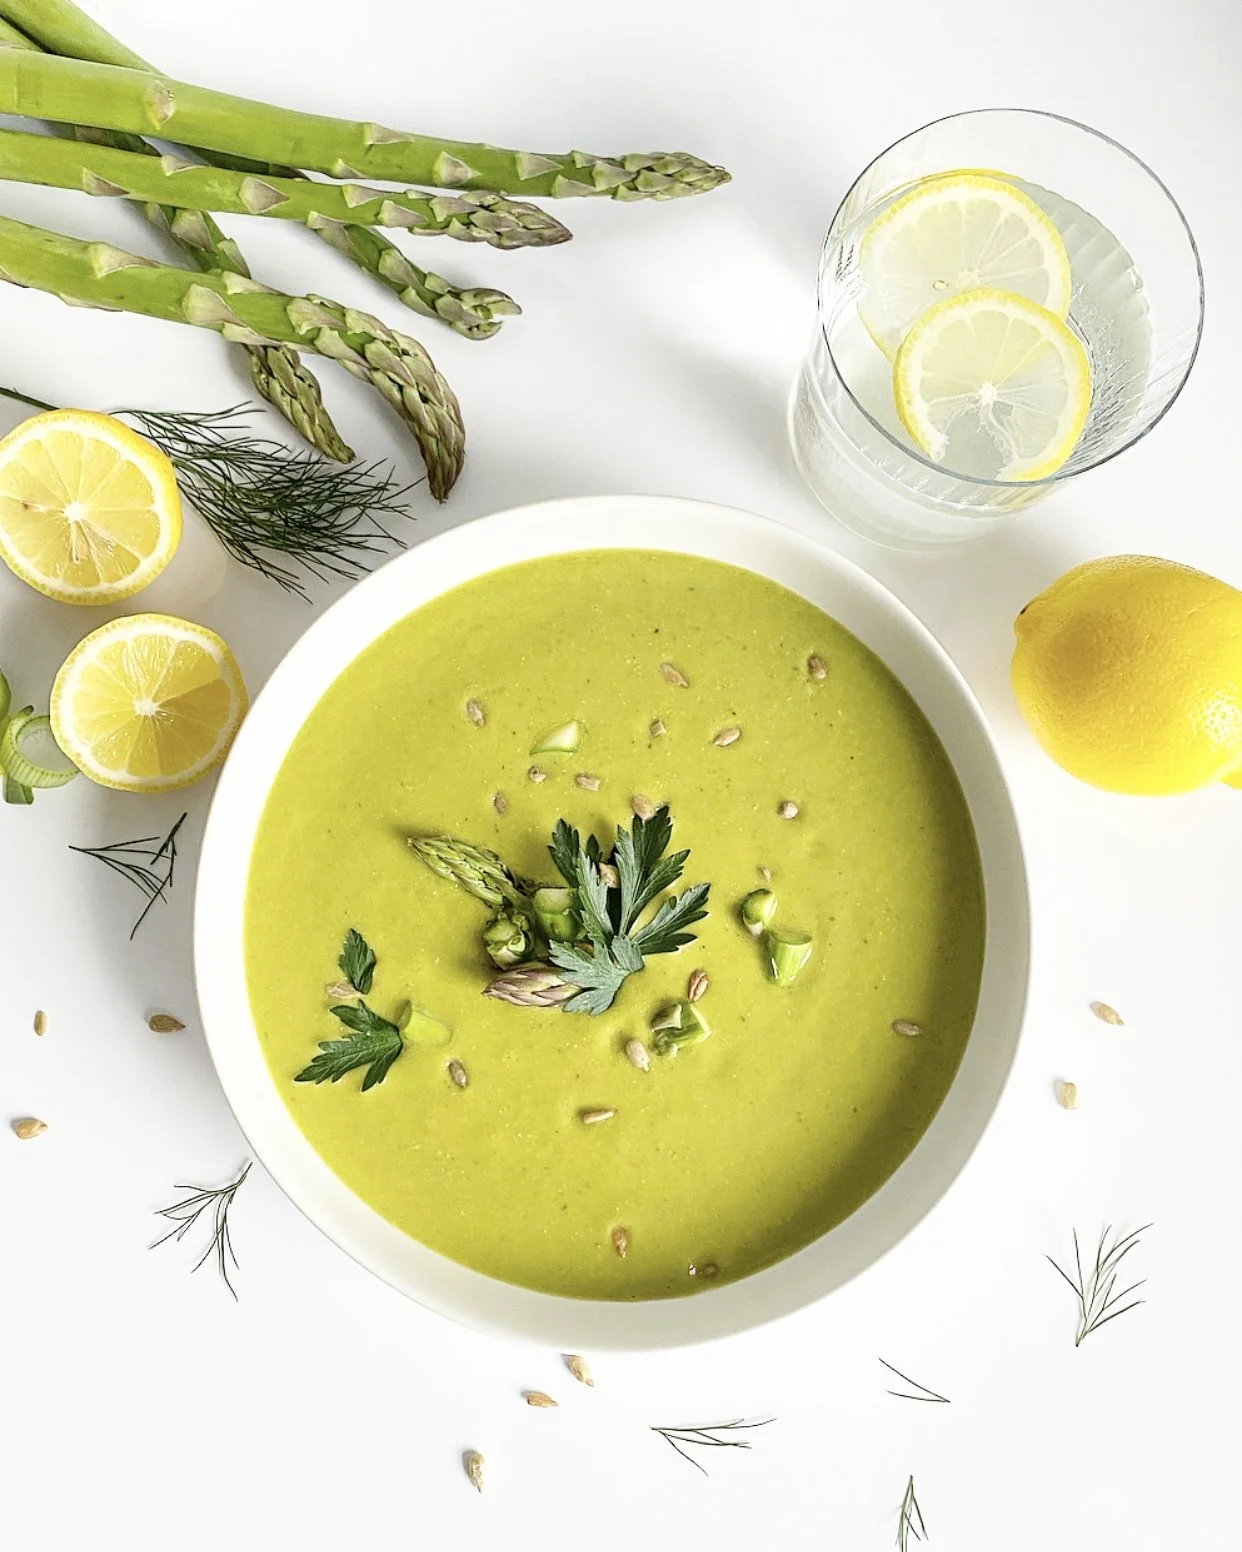
Creamy Asparagus Soup with Fresh Herbs and Tangy Lemon Juice

Spring is the perfect time to enjoy a bowl of creamy asparagus soup with fresh herbs and tangy lemon juice. This delightful soup is not only incredibly flavorful and creamy, but also easy to prepare with just a handful of ingredients. Pair it with a piece of crusty bread and a small side salad for a light and healthy meal.

Ingredients

  • 1 medium onion, diced

  • 2 tablespoons extra-virgin olive oil

  • 1 large bunch of asparagus, trimmed and chopped into 1-inch pieces (about 3 cups)

  • 2 1/2 cups low-sodium vegetable broth

  • 1/2 cup soaked cashews

  • Juice of one medium lemon

  • 1/4 teaspoon fine sea salt

  • Pinch of black pepper

  • 2 tablespoons fresh chopped dill or tarragon

  • 1/4 cup fresh chopped basil

  • 1/4 cup fresh Italian parsley

Directions

Sauté the Vegetables

  1. In a large pot, heat the extra-virgin olive oil over medium-high heat.

  2. Add the diced onion and sauté until soft and translucent, about 6 to 8 minutes.

  3. Add the chopped asparagus and sauté for another 2 minutes.

Simmer the Soup

  1. Add 2 cups of vegetable broth to the pot and simmer over low-medium heat for 5 minutes, or until the asparagus is slightly tender.

  2. Remove from heat and allow to cool slightly.

Blend the Ingredients

  1. In a blender, add the remaining 1/2 cup of vegetable broth, lemon juice, and soaked cashews. Blend for 1 minute, or until the mixture is smooth.

  2. Add the onion/asparagus mixture with the broth to the blender. Blend again until smooth.

  3. Add the salt, pepper, and fresh herbs. Blend for another minute until the soup is creamy and smooth.

Final Touches

  1. Taste and season further if needed.

  2. Reheat the soup in the same pot if desired, or enjoy it at room temperature.

  3. Serve with a crusty piece of bread.

Enjoy this beautiful and nutritious soup, perfect for welcoming the spring season!

Don’t miss a beet with our Newsletter!

Thai Noodle Salad With Perfect Peanut Sauce

Our Cold Thai Noodle Salad is a Tuesday Foods house favorite. This dish has hearty noodles with tons of crisp, fresh veggies tossed with our house made Perfect Peanut Sauce, and topped with crunchy peanuts and herbs.

This dish is rich in plant-based protein on it’s own, with 20g per serving. If you are looking for an added protein boost, it would pair very well with shredded organic chicken or Baked Ginger Sesame Tofu.

Thai Noodle Salad With Perfect Peanut Sauce

Ingredients

  • 6 ounces dry noodles (brown rice noodles, pad thai style rice noodles, or soba)

  • 4 cups mix of red cabbage, carrots and radish, shredded or grated

  • 1 cup frozen edamame, thawed

  • 1 red bell pepper, finely sliced

  • 3 scallions, sliced

  • 1/2 bunch cilantro with stems, chopped (or sub basil and mint)

  • 1 tablespoon jalapeño, finely chopped

  • 1/4–1/2 cup roasted, crushed peanuts (optional garnish)

Thai Peanut Sauce (You may not need all - so save extra)

  • 5 thin slices ginger- cut across the grain, about the size of a quarter.

  • 2 cloves garlic

  • 1/2 cup peanut butter

  • 1/2 cup fresh orange juice (1 large orange)

  • 1/3 cup fresh lime juice (2 limes)

  • 1/4 cup soy sauce or tamari

  • 1/3 cup honey or maple syrup

  • 1/4 cup toasted sesame oil

  • 1 – 1 1/2 teaspoons cayenne pepper (or a dash of sriracha sauce)

  • 1 teaspoon salt

Note: This dish is rich in plant-based protein but can be paired with shredded organic chicken, or our Baked Sesame Ginger Tofu. Link for recipe!

Instructions:

  1. Cook Noodles: Cook pasta according to directions on package. Drain and chill under cold running water. 

  2. Blend the Peanut Sauce: while noodles are cooking, blend the peanut sauce ingredients together using  a blender until smooth.

  3. Toss: Place shredded veggies, bell pepper, scallions, cilantro and jalapeño into a serving bowl. Toss. Add the cold noodles to the serving bowl and toss again. Pour some peanut sauce over top and toss well to combine- no need to use all, just use enough to coat well. (save the extra sauce)

  4. Taste: Adjust the salt, add chili flakes if you want, or more lime, and serve, garnishing with roasted peanuts and cilantro and a lime wedge.

Don’t miss a beet with our Newsletter!

Easy Vegan Coconut Curry

The best kind of recipes are the ones that you keep making over and over again, until you finally realize – this is one of my favorite recipes! That’s this Vegan Easy Coconut Curry. It is one of our original Tuesday Foods recipes - and without a doubt, it’s a CROWD PLEASER. We always have all the ingredients in our pantry and it comes together quickly and easily. Everybody always comes back for seconds, and it makes great leftovers too!

This is our foundational curry recipe, but it is very flexible.  We encourage you to use it as a template. Here are some ideas to change it up:

1. Use different veggies. If you don’t have butternut squash, use sweet potatoes. If you don’t have cauliflower, then use broccoli. Carrots, bell peppers, swiss chard, or spinach and potatoes would be great additions as well.

2. If you want more heat, spice it up. Add extra chiles or red pepper flakes. You can bump up all of the spices too.

3. Vary how you serve it. You can serve this curry with basmati rice, black forbidden rice, brown rice, cauliflower rice, or quinoa. You can also customize it with any type of protein that you like in your curry, or you can just make the recipe exactly as it’s written....Our favorite version!

Easy Vegan Coconut Curry

Ingredients:

  • 1 tablespoon coconut oil

  • 1 cup chopped yellow onion

  • 2 garlic cloves, minced

  • 1/2 teaspoon grated fresh ginger

  • 1/2 teaspoon cumin

  • 1/4 teaspoon coriander

  • 1/4 teaspoon turmeric

  • 1/4 teaspoon cardamom

  • 1 teaspoon sea salt

  • 2 cups cubed butternut squash

  • 3 red Thai chiles, or 1 serrano, or ½ jalapeño, thinly sliced

  • 2 cups cauliflower florets

  • 1 can full-fat coconut milk

  • 1 tablespoon fresh lemon juice

  • 1 tablespoon fresh lime juice, plus lime wedges for serving

  • 4 cups fresh spinach

  • 1/2 cup fresh or frozen peas

  • Freshly ground black pepper

For serving:    

  • 2 cups cooked basmati rice

  • lime wedges

  • Fresh herbs - basil, cilantro, scallions

  • Chopped peanuts    

  • Naan bread, optional

Instructions:

1. Heat the oil in a large Dutch oven over medium heat. Add the onion and cook until soft and well-browned, about 10 minutes, reducing the heat to low halfway through.

2. In a small bowl, mix together the garlic, ginger, cumin, coriander, turmeric, cardamom, and salt. Set aside.

3. Add the butternut squash and chiles to the pot, stir, and cook for 5 minutes. Stir in the cauliflower and then add the coconut milk and the spice mixture. Cover and simmer for 20 minutes or until the vegetables are tender.

4. Add the lemon juice, lime juice, spinach, peas, and stir. Taste and adjust seasonings, adding additional lime juice, salt, and pepper, as desired.

5. Serve the curry over the rice with fresh herbs and peanuts, naan bread and lime wedges on the side.

Air Fryer Veggies

Air Fryer Roasted Vegetables are a delicious and healthy side dish that the whole family will love. It couldn't be easier to roast veggies in the air fryer, and they come out perfectly tender-crisp every time.

If you are looking to purchase an air fryer, we are loving the Wonder Oven - made by Our Place. It’s a high tech counter-top appliance that can air fry, bake, roast, toast, reheat, and broil – all with steam infusion technology for crispy exteriors and soft, moist interiors. We highly recommend this little gem….it’s beautiful and functional!


Why we love using the Air Fryer to Roast Vegetables……

  • Roasting vegetables adds a depth of flavor that can't be beat.

  • Even the pickiest eater will enjoy this perfectly cooked mix of veggies. It's a delicious way to get some healthy vegetables on everyone's plate!

  • Cooking vegetables in the air fryer takes about half the time as oven roasting, so it's perfect for busy weeknights.

  • Air fryer veggies are a perfect side dish, but they're also very versatile! You can also use them in sandwiches, pasta sauces and tossed in salads.

Air Fryer Veggies

Recipe Source: Love and Lemons

Ingredients

  • 1 zucchini or yellow squash, cut into ½-inch half-moons

  • 1 red bell pepper, stemmed, seeded, and chopped into 1-inch pieces

  • 4 ounces cremini mushrooms, quartered

  • 1 small red onion, chopped into 1-inch pieces

  • 1 carrot, sliced into thin rounds

  • 1 cup small broccoli florets

  • 1 cup small cauliflower florets

  • 3 tablespoons extra-virgin olive oil

  • 1 teaspoon Italian seasoning

  • 1/2 teaspoon garlic powder

  • 1/2 teaspoon sea salt

  • Freshly ground black pepper

  • lemon wedge, for squeezing

  • Grated Parmesan cheese, for serving, optional

  • Chopped fresh parsley, for garnish

Instructions

  1. Preheat the air fryer to 375°F.

  2. Place all the veggies in a large bowl. Add the olive oil, Italian seasoning, garlic powder, salt, and several grinds of pepper and toss to coat.

  3. Add some of the vegetables to the air fryer, just enough to fit in a single layer and cook for 10 to 12 minutes, tossing halfway, or until the vegetables are tender and browned. Repeat with the remaining veggies.

  4. Transfer the air fried vegetables to a serving dish and squeeze with lemon juice. Top with grated Parmesan cheese, if desired, and garnish with fresh parsley.

Don’t miss a beet with our Newsletter!

Brazil Nuts {Why We Love Them}


All The Reasons We Love Brazil Nuts + Our Superfood Granola Recipe Below!

SUPPORT IMMUNITY

The outstanding health benefit of brazil nuts is that they are incredibly rich in Selenium. Selenium is a powerful antioxidant that fights against free radicals in the body, protecting against disease and illnesses, reducing inflammation and helping to maintain healthy thyroid function. One serving contains 700% of your daily selenium intake!
NOTE: Brazil nuts are the best way to get our daily requirement of Selenium! No need for supplements - Eating one brazil nut provides you with all the selenium your body needs!

PROMOTE YOUTHFUL, GLOWING SKIN

Brazil nuts are loaded with antioxidants that can reduce fine lines and signs of aging. Vitamins A and E help to increase skin collagen, resulting in a smoother complexion. Selenium speeds up cell turnover and provides your complexion with a natural glow. It also promotes skin health by improving the elasticity of the skin, and reducing redness.

GIVE YOU A PROTEIN BOOST

Brazil nuts are good sources of complete protein, which means they provide all essential amino acids needed for our growth, repair and development.

SUPPORT HEART HEALTH

Brazil nuts are bursting with heart-healthy monounsaturated fats, which help to lower cholesterol and prevent cardiovascular and heart disease.

RECIPE: Brazil Nut Superfood Granola

Ingredients:
• 2 cups oats
• 1 cup brazil nuts
• 1 cup pecans
• 1/2 cup coconut flakes
• 1/2 cup raisins
• 1/2 cup pumpkin seeds
• 1/2 cup ground flaxseeds
• 2 tbsp chia seeds
• 1/4 cup coconut oil
• 1/4 cup maple syrup
• 1 tsp vanilla extract

• 2 tsp cinnamon

Directions:

1. Preheat oven to 180 degrees

2. Start by chopping your brazil nuts and pecans into smaller chunks. To save time you can quickly pulse them in a food processor. Mix in a bowl with all the other other seeds, coconut flakes, raisins and the oats.

3. In a saucepan, combine the coconut oil, maple syrup, vanilla extract and cinnamon. Heat until the coconut oil is melted. Pour into the dry ingredients and mix until everything is well coated.

4. Place the mixture on a lined baking tray and place in the oven to cook for around half an hour.

Don’t miss a beet with our Newsletter!

Breakfast At Bonnie's {Aspen's Favorite Oatmeal Pancakes}

Opening December 15 for the season, Bonnie’s Restaurant is one of those iconic Aspen staples - where everyone from ski bums to movie stars go to enjoy a homemade meal in a cozy, family style restaurant that is rich with local history.

Bonnie's is located mid-mountain, on Aspen Mountain and has long been a skier's favorite for breakfast. You can swing by off the groomed trails on Tourtelotte Park, or (for the hard core athletes) take an early morning skin up the mountain for a cup of coffee and a plate of their famous oatmeal pancakes to warm the soul and fuel the body.

The Oatmeal Pancakes are a breakfast fan favorite in Aspen, and we couldn’t wait to create a Tuesday Foods version. It’s simple, but nutrient dense, and we make it vegan and gluten free. So in case you’re not going to be skiing or skinning on Aspen Mountain anytime soon, we've got you covered with this crowd-pleasing pancake recipe!

Bonnie’s Inspired Oatmeal Pancakes

Ingredients:

  • 1 cup old-fashioned rolled oats

  • 1 cup almond milk

  • 2 tablespoons maple syrup

  • 1 teaspoon vanilla extract

  • 1/2 cup + 3 tablespoons All-Purpose Flour (For gluten free we use Bob’s Red Mill 1:1 Baking Flour)

  • 1 tablespoon baking powder

  • 1/4 teaspoon salt

  • 1/2 teaspoon cinnamon

If you like adding flavor to your pancakes, you can stir in 1/4 cup of fresh berries, sliced or mashed bananas,chocolate chips, or chopped nuts.


Instructions:

In a high-speed blender, blend the oats, almond milk maple syrup, and vanilla extract until smooth. About 20 seconds.

In a mixing bowl, whisk flour, baking powder, salt, and cinnamon.

Pour the liquid from the blender onto the bowl with flour mixture and whisk to combine and form a thick pancake batter. If extremely thick, thin it out by adding 1-2 tablespoons of almond milk. It should be thick but easy to pour.

Warm a pancake griddle or crepe pan over medium-high heat. Oil the pan (coconut oil works well here) and scoop out 2 tablespoons of batter per pancake.

Cook for 2-3 minutes on one side or until the edges are drying. Then slide a spatula under the pancake and flip it on the other side to cook for an extra 1-2 minutes or until golden brown.

Cool down on a wire rack while cooking the remaining batter. Repeat the steps above to cook all the pancakes.

Serve with maple syrup. Add berries, sliced banana, chopped nuts as toppings!


CHEF PREPARED, NUTRITIONIST APPROVED, HEALTHY MEALS MADE EASY.…
FROM OUR KITCHEN TO YOURS!


Creamy Cauliflower Wild Rice Soup

OUR GO-TO COMFORT DISH ON A COLD WINTER DAY!

We are so happy that our TF Chef, Tess W. Strokes discovered this delicious and hearty recipe from Running On Real Food!

What is better than a warm bowl of creamy cauliflower soup on a wintery evening? It has a nutty, cheesy flavor and luxuriously creamy texture with tender bites of cauliflower, carrot and wild rice. This comforting Plant-based cauliflower soup is filling and hearty enough to satisfy the whole family.

Cauliflower is loaded with vitamins, minerals and antioxidants like Vitamin C, Vitamin K, Vitamin B6, Folate, Pantothenic Acid, Potassium and Manganese. And guess what? Cauliflower is also a good source of plant-powered protein.

Garlic adds medicinal benefits to this soup, ranging from it's antibacterial and anti-fungal properties to healing the body with antioxidants. Garlic is great for helping boost your immune system - making it a powerful and flavorful way to spice up any meal.

We love this soup served with a squeeze of lemon, toasted pepitas and a sprinkle of fresh chives or scallions. Pair it with a hearty piece of crusty bread, and you have the makings for a very happy belly.


Creamy Cauliflower Wild Rice Soup

Ingredients

  •  1 cup chopped celery

  • 1 medium white onion, diced

  • 3 cloves garlic, minced

  • 1 tsp ground thyme

  • 1 tsp dried oregano

  • 2 cups peeled and diced carrots

  • 1 small head of cauliflower, chopped into small florets

  • 5 cups vegetable broth

  • 1/2 cup nutritional yeast

  • 1 1/2 cups cooked wild rice

  • 1 tsp each sea salt and black pepper, or more to taste

  • 2 tbsp fresh lemon juice

  • Optional garnishes: Toasted pepitas, fresh chives, scallions or parsley.

Instructions

Cook Rice: Cook the wild rice according to package instructions. While it’s cooking, proceed with making the soup.

Saute Vegetables: Add the onion, garlic and celery a large soup pot with 2 tablespoons of water and cook over medium heat for about 5 minutes until starting to soften, stirring often (alternatively, you can saute the veggies in 1 tbsp of olive oil). If the pot starts to dry out at any time, add another tablespoon of water

Add Herbs: Add the thyme and oregano, stir to combine and cook for another 2 minutes until fragrant, stirring frequently.

Simmer Soup: Add the cauliflower, carrot and all of the vegetable stock and simmer over medium-low heat until the carrots and cauliflower are tender. This should take approximately 20 minutes.

Add Nutritional Yeast: Stir in the nutritional yeast.

Serve with a big squeeze of fresh lemon and garnishes!

CHEF PREPARED, NUTRITIONIST APPROVED, HEALTHY MEALS MADE EASY.…

FROM OUR KITCHEN TO YOURS!

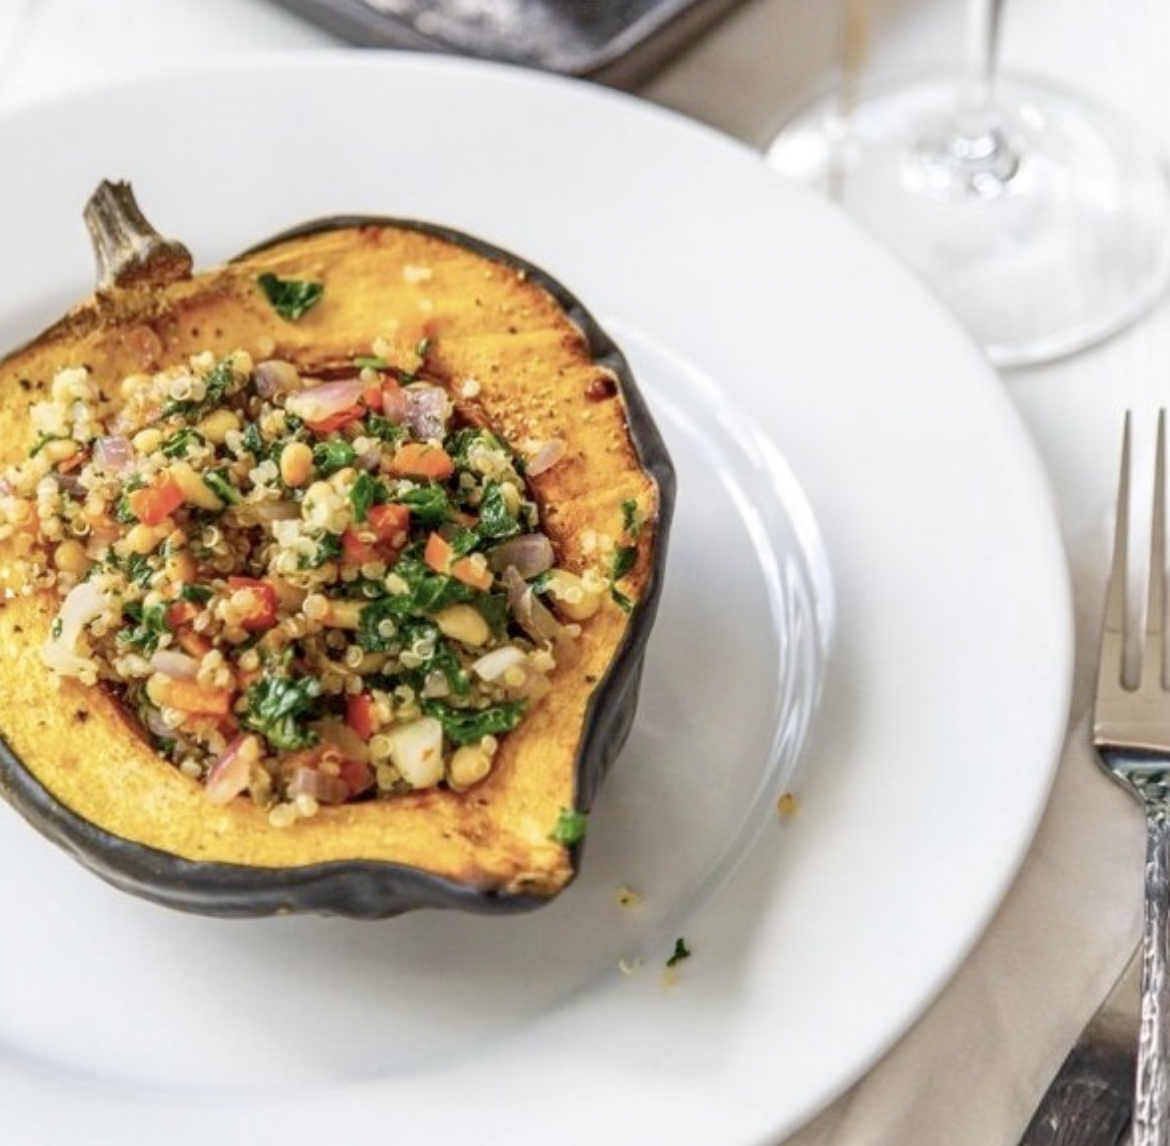
Stuffed Acorn Squash With Pine Nut Parmesan

Photo credit @veganosity

This is one of our favorite family recipes, (passed down from Kelly’s mom, Kate) and a long time, top- of-the-list for vegan holiday dishes. Made with delicious roasted acorn squash filled with an incredibly satisfying filling that is amazing!

The roasted acorn squash is cooked until it’s caramelized, which gives it depth and richness. We fill it with nutty quinoa, and savory vegetables, and top it with our Tuesday Foods Toasted Pine Nut Parmesan (recipe below). This is one for the books!

Plus, we love that it's satiating, celebrates the harvest, and is beautiful when served to guests or for a party of one.


Stuffed Acorn Squash

Ingredients:

  • 4 acorn squash

  • 2 tablespoons evoo

  • Maldon sea salt + coarse black pepper

  • 1 cup quinoa

  • 1 cup sweet white onion

  • 1 cup diced red pepper

  • 1/2 cup chopped parsley

  • Optional: 1/2 cup feta (we like Violife, for a vegan option)

  • 2 tsp red wine vinegar

  • Pinch of red pepper flakes + a sprinkle of pine nut parmesan

Instructions:

1. Heat oven to 425.

2. Brush squash with oil and season generously with salt and pepper.

3. Roast squash cut side down until tender and caramelized (20 to 25 minutes).

4. Sauté onion and pepper until soft and caramelized.

4. Prepare quinoa and once cooked combine with onions and peppers, chopped parsley and crumbled feta. Drizzle with olive oil and vinegar and toss to combine.

5. Top with a sprinkle of red pepper flakes and our pine nut Parmesan. (recipe below)


Toasted Pine Nut Parm


Ingredients:

  • 1/2 cup pine nuts

  • 2 tablespoons macadamia nuts

  • 2 tablespoons hemp seeds

  • 1/4 cup nutritional yeast

  • pinch of salt

  • pinch of garlic powder

Instructions:

1. Combine all ingredients in a food processor to desired sprinkle-able texture.


CHEF PREPARED, NUTRITIONIST APPROVED, HEALTHY MEALS MADE EASY.…
FROM OUR KITCHEN TO YOURS!

Crisp Apple Margarita {Made With Olipop}

Crisp Apples paired with tequila and lime…..this OLIPOP Crisp Apple Margarita is the perfect “healthy-ish” cocktail for celebrating the holidays! 

We love using OLIPOP sparkling tonics as mixers in our cocktails and the crisp apple flavor brings this drink to life. OLIPOP is a bubbly beverage just like your favorite pop, but without all of the unhealthy added ingredients and high amounts of sugar. It’s a sparkling tonic beverage made with “eight unique botanicals, plant fibers, and prebiotics (the primo food source for beneficial bacteria), each hand-picked for their biome-supporting benefits.”

Healthy ingredients aside, it also tastes AMAZING! The crisp apple flavor is a limited seasonal release…..and one of our favorites! You can find it at Whole Foods or here on the OLIPOP site.

Cheers!

Crisp Apple Margarita

For The Margarita:

  • Ice

  • 2 oz reposado tequila

  • 3/4 oz lime juice (about 1 medium lime, juiced)

  • Top with Olipop CRISP APPLE

For The Glass Rim and Garnish:

  • 1 teaspoon sugar (We use coconut sugar)

  • 1 teaspoon kosher salt or sea salt

  • 1/2 teaspoon ground cinnamon

  • Lime wedges

  • Optional garnish: 1 apple slice, sprig of rosemary, cinnamon stick or star anise per drink

First: On a small plate, use a fork to mix the sugar, salt and cinnamon. Run a wedge of lime around the top of each drinking glass, then turn the glass down at a 45-degree angle and roll the top of the glass through the cinnamon, sugar and salt blend.

Now fill the glass with ice and add 2 oz reposado tequila + 3/4 oz lime juice. Top with Olipop Crisp Apple
Garnish with 1 or 2 choices from optional garnishes - apple slice, rosemary, cinnamon stick or star anise.

Don’t Miss A Beet With Our Newsletter

White Bean Chili {Vegan}

This Vegan White Bean Chili is flavorful, spicy and oh so delicious. It’s the perfect recipe for a cozy fall dinner, a fun (and easy) game day meal, and the perfect family comfort food. It’s thick and hearty, and seriously soul-warming.

We think that homemade chili is the ultimate one pot meal. This version is all white - with white beans, corn and potatoes - and hints of green from flavorful poblano peppers, cilantro and lime. Double this recipe and you have a ready made Superbowl party!

And of course, the toppings make it extra special. We always go for cubed avocado, red pepper flakes, cilantro, fresh limes, green onions and jalapeno. To make it extra hearty - add grated cheese, sour cream, and shredded, roast chicken. Just put out the fixin’s and let the guests help themselves!

Vegan White Bean Chili

Ingredients:

  • 2 tbsp olive oil

  • 1 medium onion diced

  • 3 poblano peppers, seeded and diced

  • 2 stalks celery, diced

  • 2 cloves garlic, minced

  • 1 tsp cumin

  • 1/2 teaspoon coriander

  • 1/4 teaspoon cayenne pepper, plus more to taste

  • 3/4 teaspoon dried oregano

  • 1 tsp salt + Freshly cracked black pepper, to taste

  • 1 15oz cans white beans, drained and rinsed well (we like cannelini)

  • 2 medium potato, peeled and diced small

  • 2 cups fresh corn (frozen works well here)

  • 4 cups vegetable broth

  • Fresh cilantro and lime wedges to finish

  • Optional toppings: Cubed avocado, red pepper flakes, chopped green onion, grated cheese, sour cream (The variations are endless!)

Instructions:

  1. Heat the oil in a large pot or dutch oven over medium heat. Add the onion, celery, and poblano peppers and cook, stirring occasionally until the veggies are softened - about 6-8 minutes. Add the garlic, cumin, coriander and 1/4 teaspoon of cayenne and cook, stirring until fragrant, about 30 seconds.

  2. Add the potatoes, broth and oregano and bring to a simmer for 10 minutes, until the potatoes are fork tender.

  3. Add the white beans, and continue to simmer lightly for 15-20 minutes.

  4. With a potato masher or immersion blender, pulse or mash potatoes and beans 3 or 4 times to create some texture. Fold in the corn, and turn off the heat. Season with the salt salt and pepper.

  5. To finish: Ladle into individual bowls and top each serving with a generous squeeze of fresh lime juice and a sprinkle of cilantro. Garnish with your favorite toppings!

More Cozy Fall Recipes:

Roasted Root Veggie Soup

Easy Vegetarian Chili

Vegan Sheperd’s Pie

Cauliflower Leek Soup

Don’t Miss A Beet With Our Newsletter

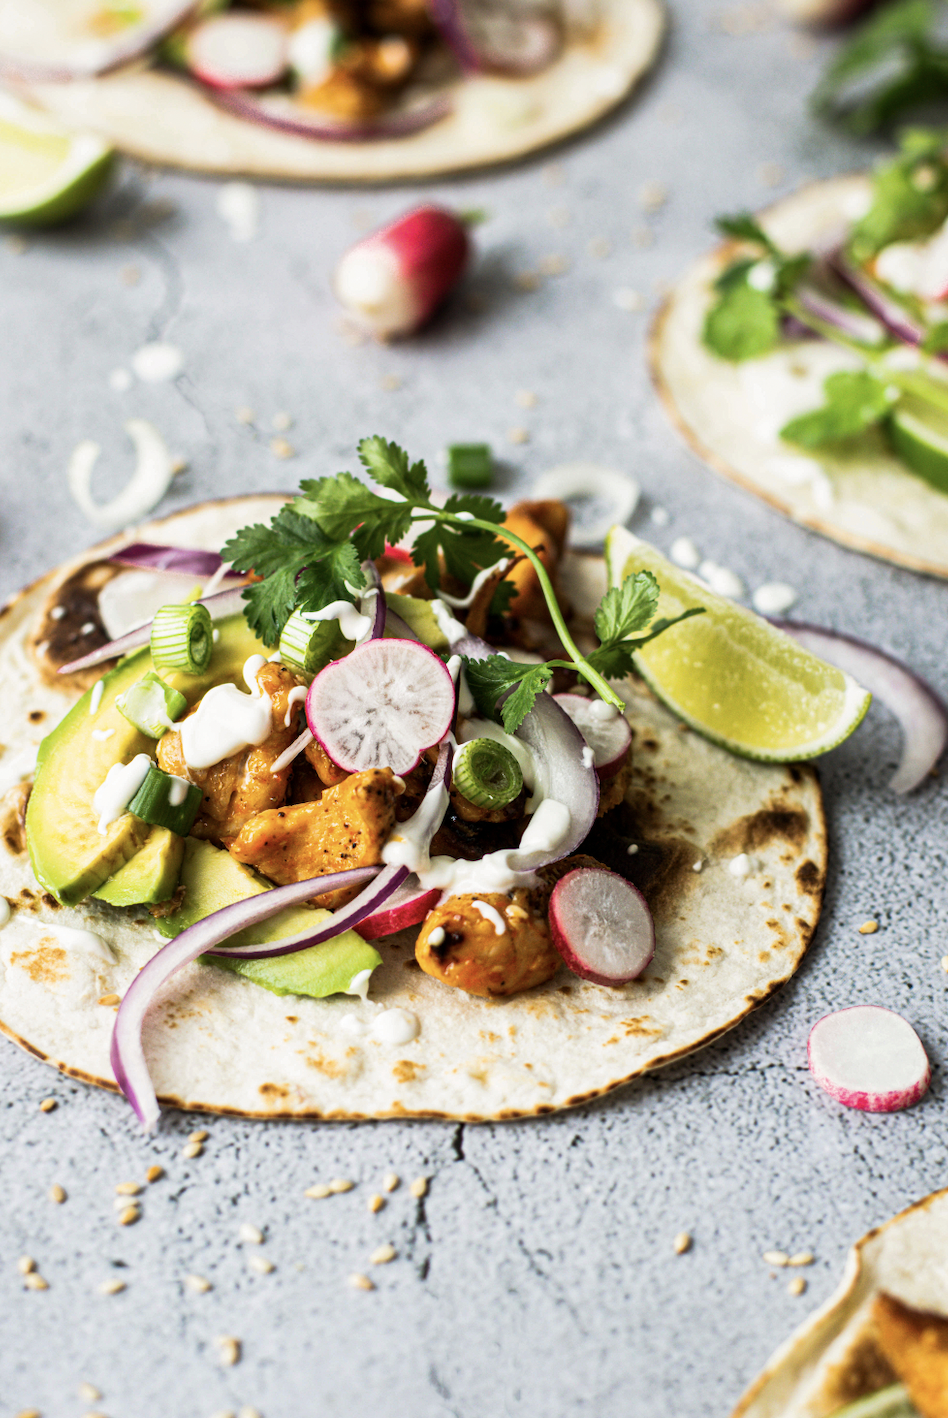
Sweet Potato and Cauliflower Tacos with Pickled Onion

Our latest obsession: Delicious Sweet Potato and Cauliflower Tacos from one of our favorite cookbooks, Vegan At Times!

Healthy vegan tacos filled with roasted sweet potato and cauliflower, black beans, avocado and topped with home made pickled red onions. They are loaded with healthy and hearty flavors and make a perfect week night dinner.

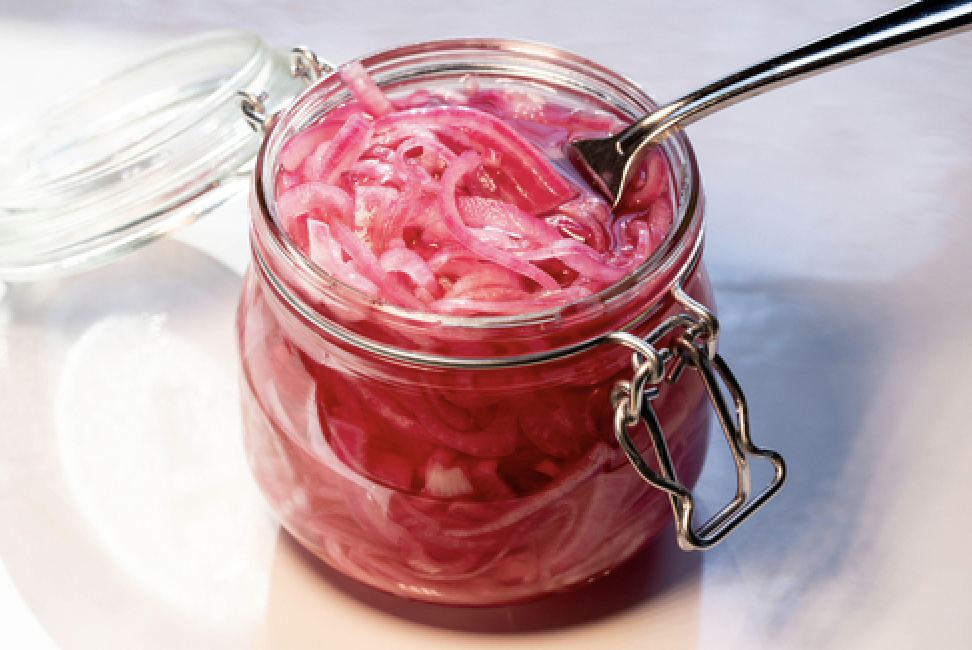
Pickled red onions are one of our favorite healthy toppings. Fermented vegetables such as kimchi, sauerkraut or pickled red onions contain high amounts of probiotics and digestive enzymes, which are so important to gut health, mood, energy and immunity. These pickled red onions contain many other vitamins and minerals such as calcium, potassium, magnesium, Vitamin C and folate.

We also love to serve these with our protein-powered Green Pea Guacamole.

Recipe Inspiration: Vegan At Times

Sweet Potato and Cauliflower Tacos with Pickled Onion

Ingredients

For the roasted vegetables:

  • 1 head cauliflower, cut into small florets

  • 1 large sweet potato, peeled and diced

  • 1 can black beans, drained and rinsed

  • 2 poblano peppers, seeded and diced

  • 1/4 cup extra virgin olive oil

  • 1 tablespoon chili powder

  • 1/8 teaspoon chipotle powder (more to taste)

  • 1/2 teaspoon kosher salt

For the pickled onion:

  • 2 small red onions

  • 2 cups white vinegar

  • 2 cups water

  • 1/3 cup maple syrup

  • 2 tablespoons sea salt

 Tacos and Toppings:

  • 8 corn tortillas

  • Sliced avocado or gucamole, fresh cilantro, and hot sauce, for serving

To make the pickled onions:

  1. Thinly slice the onions with a mandolin and divide the onions between 2 (16 ounce) jars.

  2. Heat the vinegar, water, maple and salt in a medium saucepan over medium heat. Stir until the salt dissolves, about 1 minute. Let cool and pour over the onions. Set aside to cool to room temperature, then store the onions in the fridge.

  3. The pickled onions will be ready to eat once they're bright pink and tender - about 1 hour for very thinly sliced onions, or overnight.

To prepare the vegetables:

  1. Place the cauliflower florets, diced sweet potato and diced poblano on the prepared baking sheet, drizzle with the olive oil and toss.

  2. In a small bowl, stir together the chili powder, chipotle, and salt. Sprinkle over the vegetables and toss to coat. Spread into a single layer. Roast for 25-30 minutes, turning half way through. Add the drained black beans to the sheet pan, and roast for an additional 5 minutes. Remove from the oven and set aside.

To heat the tortillas:

Using tongs, hold a tortilla over the flame of your stove. flip so both sides are slightly charred but still soft, about 15 seconds on each side. Repeat with all of the tortillas and keep them warm in towel.

Fill the tortillas with the sweet potato-cauliflower-black bean mixture and top with avocado, cilantro, hot sauce, and a fresh squeeze of lime.

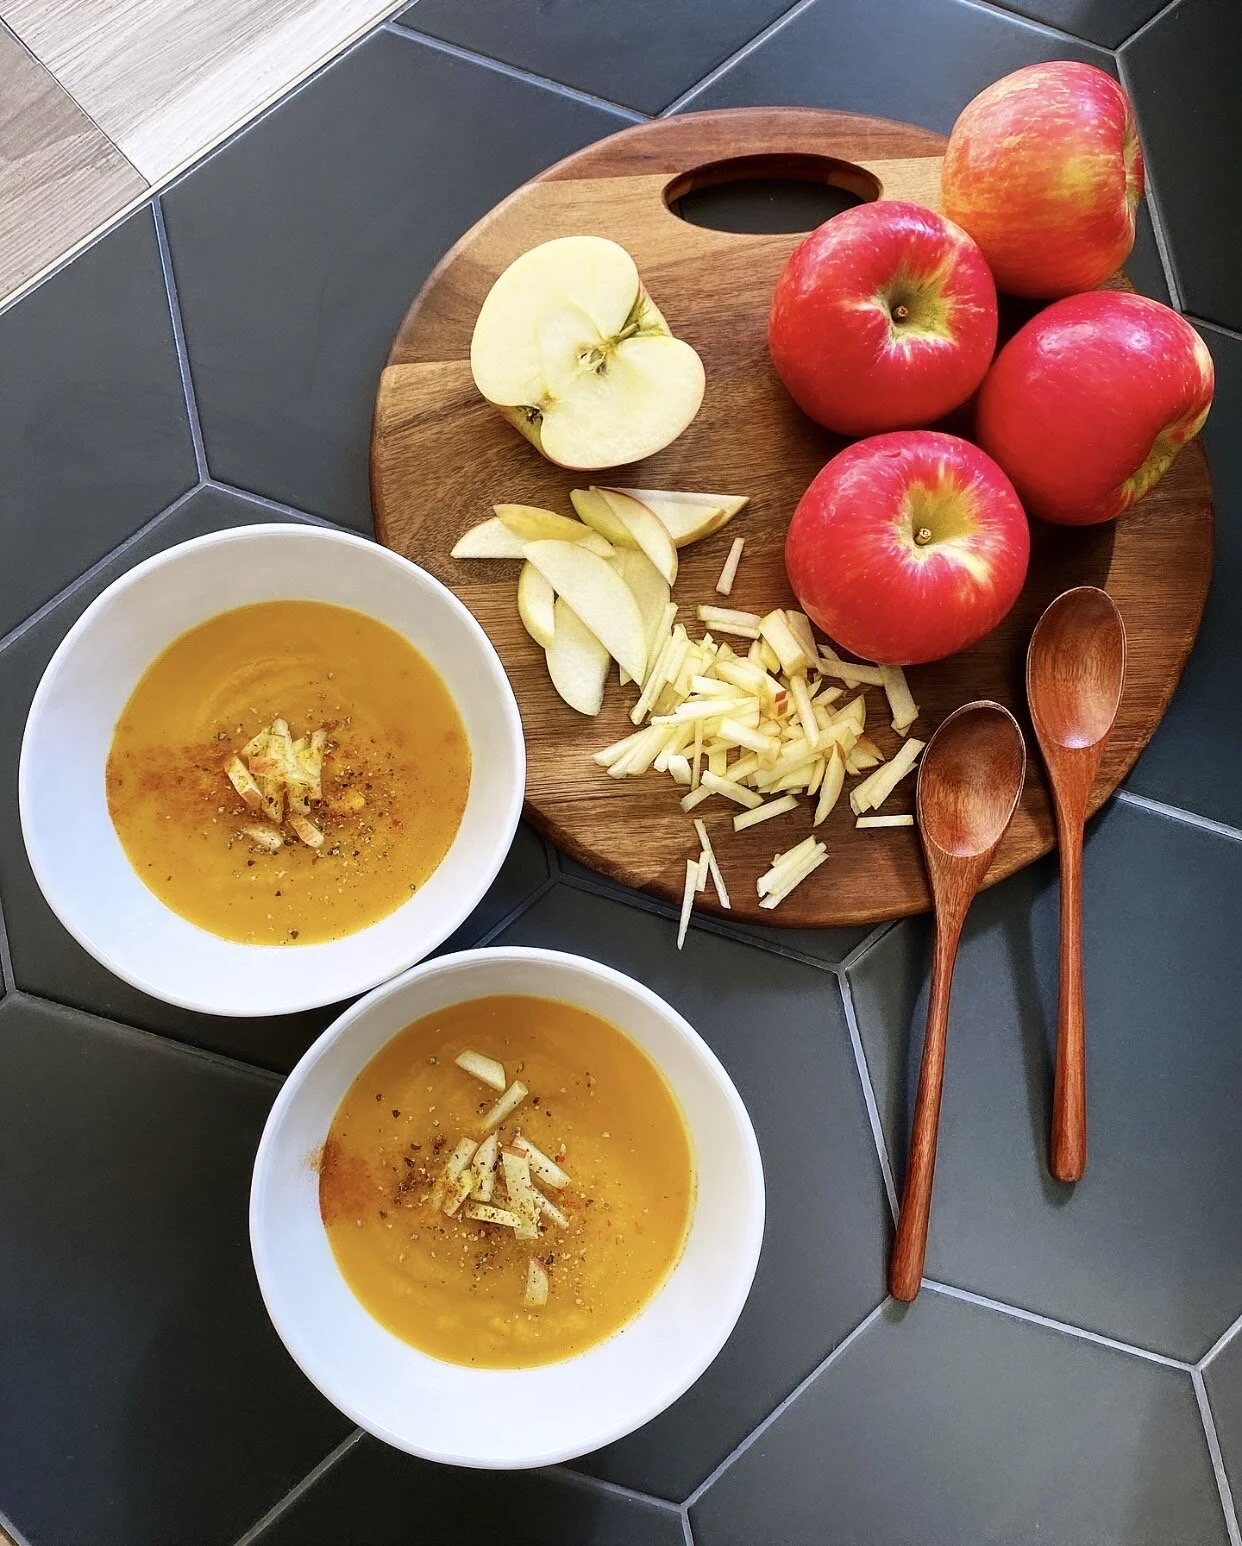
Butternut Squash Apple Soup
IMG_5230.jpeg

Our all-time favorite Butternut Squash Soup recipe!

Warming and comforting this Butternut Squash Apple Soup is super creamy (yet cream-less) a little spicy, and full of delicious butternut flavor. Perfect for those chilly days when you need some warmth and are ready to stay in and get cozy!

A big bowl of this soup with a nice slice of crusty bread makes a great lunch or light dinner. Leftover soup tastes even better the next day. It’s super-easy to make, naturally gluten-free and vegan, and SO incredibly cozy and delicious. 

Recipe inspiration from our Tuesday Foods Team - Chef Alex Karlinski, Harvest Roaring Fork

Butternut Squash Apple Soup

Ingredients:

  • 1-2 tablespoons olive oil

  • yellow onion, roughly chopped

  • 4 cloves garlic, minced

  • 1 carrot, roughly chopped

  • 1 apple, cored and roughly chopped

  • 1 large butternut squash, peeled, seeded and diced (pre-cut works well 3-4 lbs)

  • 3 cups veggie broth

  • 1 sprig fresh sage (about 1 Tbs chopped)

  • 1 tablespoon yellow curry powder

  • 1/2 teaspoon salt (more to taste)

  • 1/4 teaspoon freshly-ground black pepper (more to taste)

  • 1/8 teaspoon cayenne

  • pinch of ground cinnamon

  • 1/2 -1 can coconut milk

  • Optional garnishes: diced apple, toasted almonds, fresh herbs, drizzle of coconut milk, smoked paprika, handful of micro-greens or arugula.

Instructions:

  1. Heat 1-2 Tablespoons of olive oil in a large soup pot. Add diced onion and saute for 5 minutes, stirring occasionally. Add minced garlic, sage + spices and saute for 1-2 minutes, until fragrant.

  2. Add vegetable stock, carrot, apple and butternut squash. Toss to combine.

  3. Cook on medium-high until the mixture reaches a simmer. Then cover, reduce heat to medium-low, and simmer for 20-30 minutes until the vegetables are all tender and mash easily with a fork.

  4. Stir in the coconut milk.

  5. Use an immersion blender to puree the soup until smooth. (Or you can transfer the soup in two batches into a traditional blender and puree until smooth, being extremely careful not to fill the blender too full with a hot liquid.)

  6. Taste, and season with additional salt + pepper. Add another dash of cayenne if you like more heat. Serve warm, topped with your desired garnishes.

Don’t Miss A Beet With Our Newsletter

Fresh Corn and Basil Salad

This time of year, we take every chance we get to enjoy the sweet bounty of summer corn. While we love celebrating this versatile summer veggie in all its forms, a fresh corn salad makes a perfect dish for picnics, back-to-school potlucks, or a BBQ. When cooking for a crowd, we love a dish that can be made entirely ahead of time. Make it in advance, refrigerate it in an airtight container, and let the flavors meld with each other while it sits.

Recipe inspiration from The Barefoot Contessa Cookbook.

Fresh Corn and Basil Salad

Ingredients

  • 5 ears of corn, shucked

  • 2 scallions, white and green parts, finely sliced

  • 3 tablespoons olive oil

  • 2 tablespoons white wine vinegar

  • 1/2 teaspoon kosher salt

  • 1/2 teaspoon freshly ground black pepper

  • 1/2 cup finely torn fresh basil leaves

Instructions:

Bring a large pot of salted water to a boil. Boil the corn until tender-crisp, 3 to 4 minutes. Do not overcook. Drain the corn and immerse it in very cold water to stop the cooking process. Place the corn on a clean dish towel set over a cutting board, then use a serrated knife to cut the kernels of the cobs. (The dish towel both dries the corn and prevents it from bouncing all over the place.)

Next, combine the kernels with the oil, vinegar, scallions, salt, and pepper in a large bowl. Cover and refrigerate until ready to serve. Just before serving, toss in the fresh basil. Taste and adjust seasoning, if necessary.

CHEF PREPARED, NUTRITIONIST APPROVED, HEALTHY MEALS MADE EASY.…

FROM OUR KITCHEN TO YOURS!

Strawberry Avocado Salad

photo credit: House Of Yumm

This Strawberry Avocado Salad is a brilliant fusion of vitamins, minerals, and antioxidants….combining the healthy fats of avocado and olive oil, the fiber and protein punch of white beans, the nutty goodness of almonds and pistachios, and the healing properties of strawberries and dark green leafy greens all with a tangy splash of a simple balsamic vinaigrette

It’s really so delicious and nutrient dense!

Strawberry and Avocado Salad

For the salad:

  • 1 cup strawberries halved

  • 1 avocado, sliced or cubed

  • 1 cup spinach

  • 1 cup arugula

  • 1 15-ounce can white beans, drained and rinsed

  • 1/4 cup almonds

  • 1/4 cup pistachios

 For the dressing:

  • 1 Tbsp. balsamic vinegar

  • 1 Tbsp. olive oil

  • salt + pepper

Combine all of the salad ingredients in a bowl and set aside. Drizzle the olive oil, balsamic and salt and pepper on top of the salad, toss, and enjoy!

CHEF PREPARED, NUTRITIONIST APPROVED, HEALTHY MEALS MADE EASY.…

FROM OUR KITCHEN TO YOURS!

Perfect Peach Crisp {Vegan + Gluten Free}

It’s peach season! For the next few weeks, we will come home with a big bag of peaches after every trip to the farmers market. The season is short, so while it’s here, we make it a goal to enjoy them as much as we can.

Every summer the abundance of peaches inspires us to make this easy and delicious Peach Crisp. Because this recipe is so easy to make, it’s a great choice for summer entertaining. It’s also ideal for serving guests with special dietary needs, because it’s vegan and gluten-free!

Perfect Peach Crisp {Vegan + GF}

Ingredients:

  • 7-8 ripe peaches (halved, pits removed and chopped // I also threw in a few cherries)

  • 1 cup gluten-free rolled oats

  • 1/4 cup almond meal

  • 1/4 cup gluten-free flour (or sub all-purpose flour)

  • 1/2 cup roughly chopped pecans or walnuts

  • 2 Tbsp packed light brown sugar

  • 2 Tbsp coconut sugar

  • 1 pinch sea salt

  • 4 Tbsp olive oil or coconut oil (coconut oil will have a coconut flavor) plus more for the coating pan

 Instructions:

Preheat oven to 350 degrees F (and lightly coat an 8×8 (or similar size) baking dish with coconut or olive oil.

Add peaches, and spread flat.

To a mixing bowl add the remaining ingredients (including oil) and, using your hands or a wooden spoon, mix until all everything is evenly distributed. (This makes the crumble topping.)

Add the crumble to the top in an even layer and bake for 40-45 minutes, or until the peaches are bubbling and the top is crisp and golden.

Serve as is, or with vanilla ice cream. (We like Foragers or Moo Nada for dairy-free)

CHEF PREPARED, NUTRITIONIST APPROVED, HEALTHY MEALS MADE EASY.…

FROM OUR KITCHEN TO YOURS!

Mediterranean Bowl

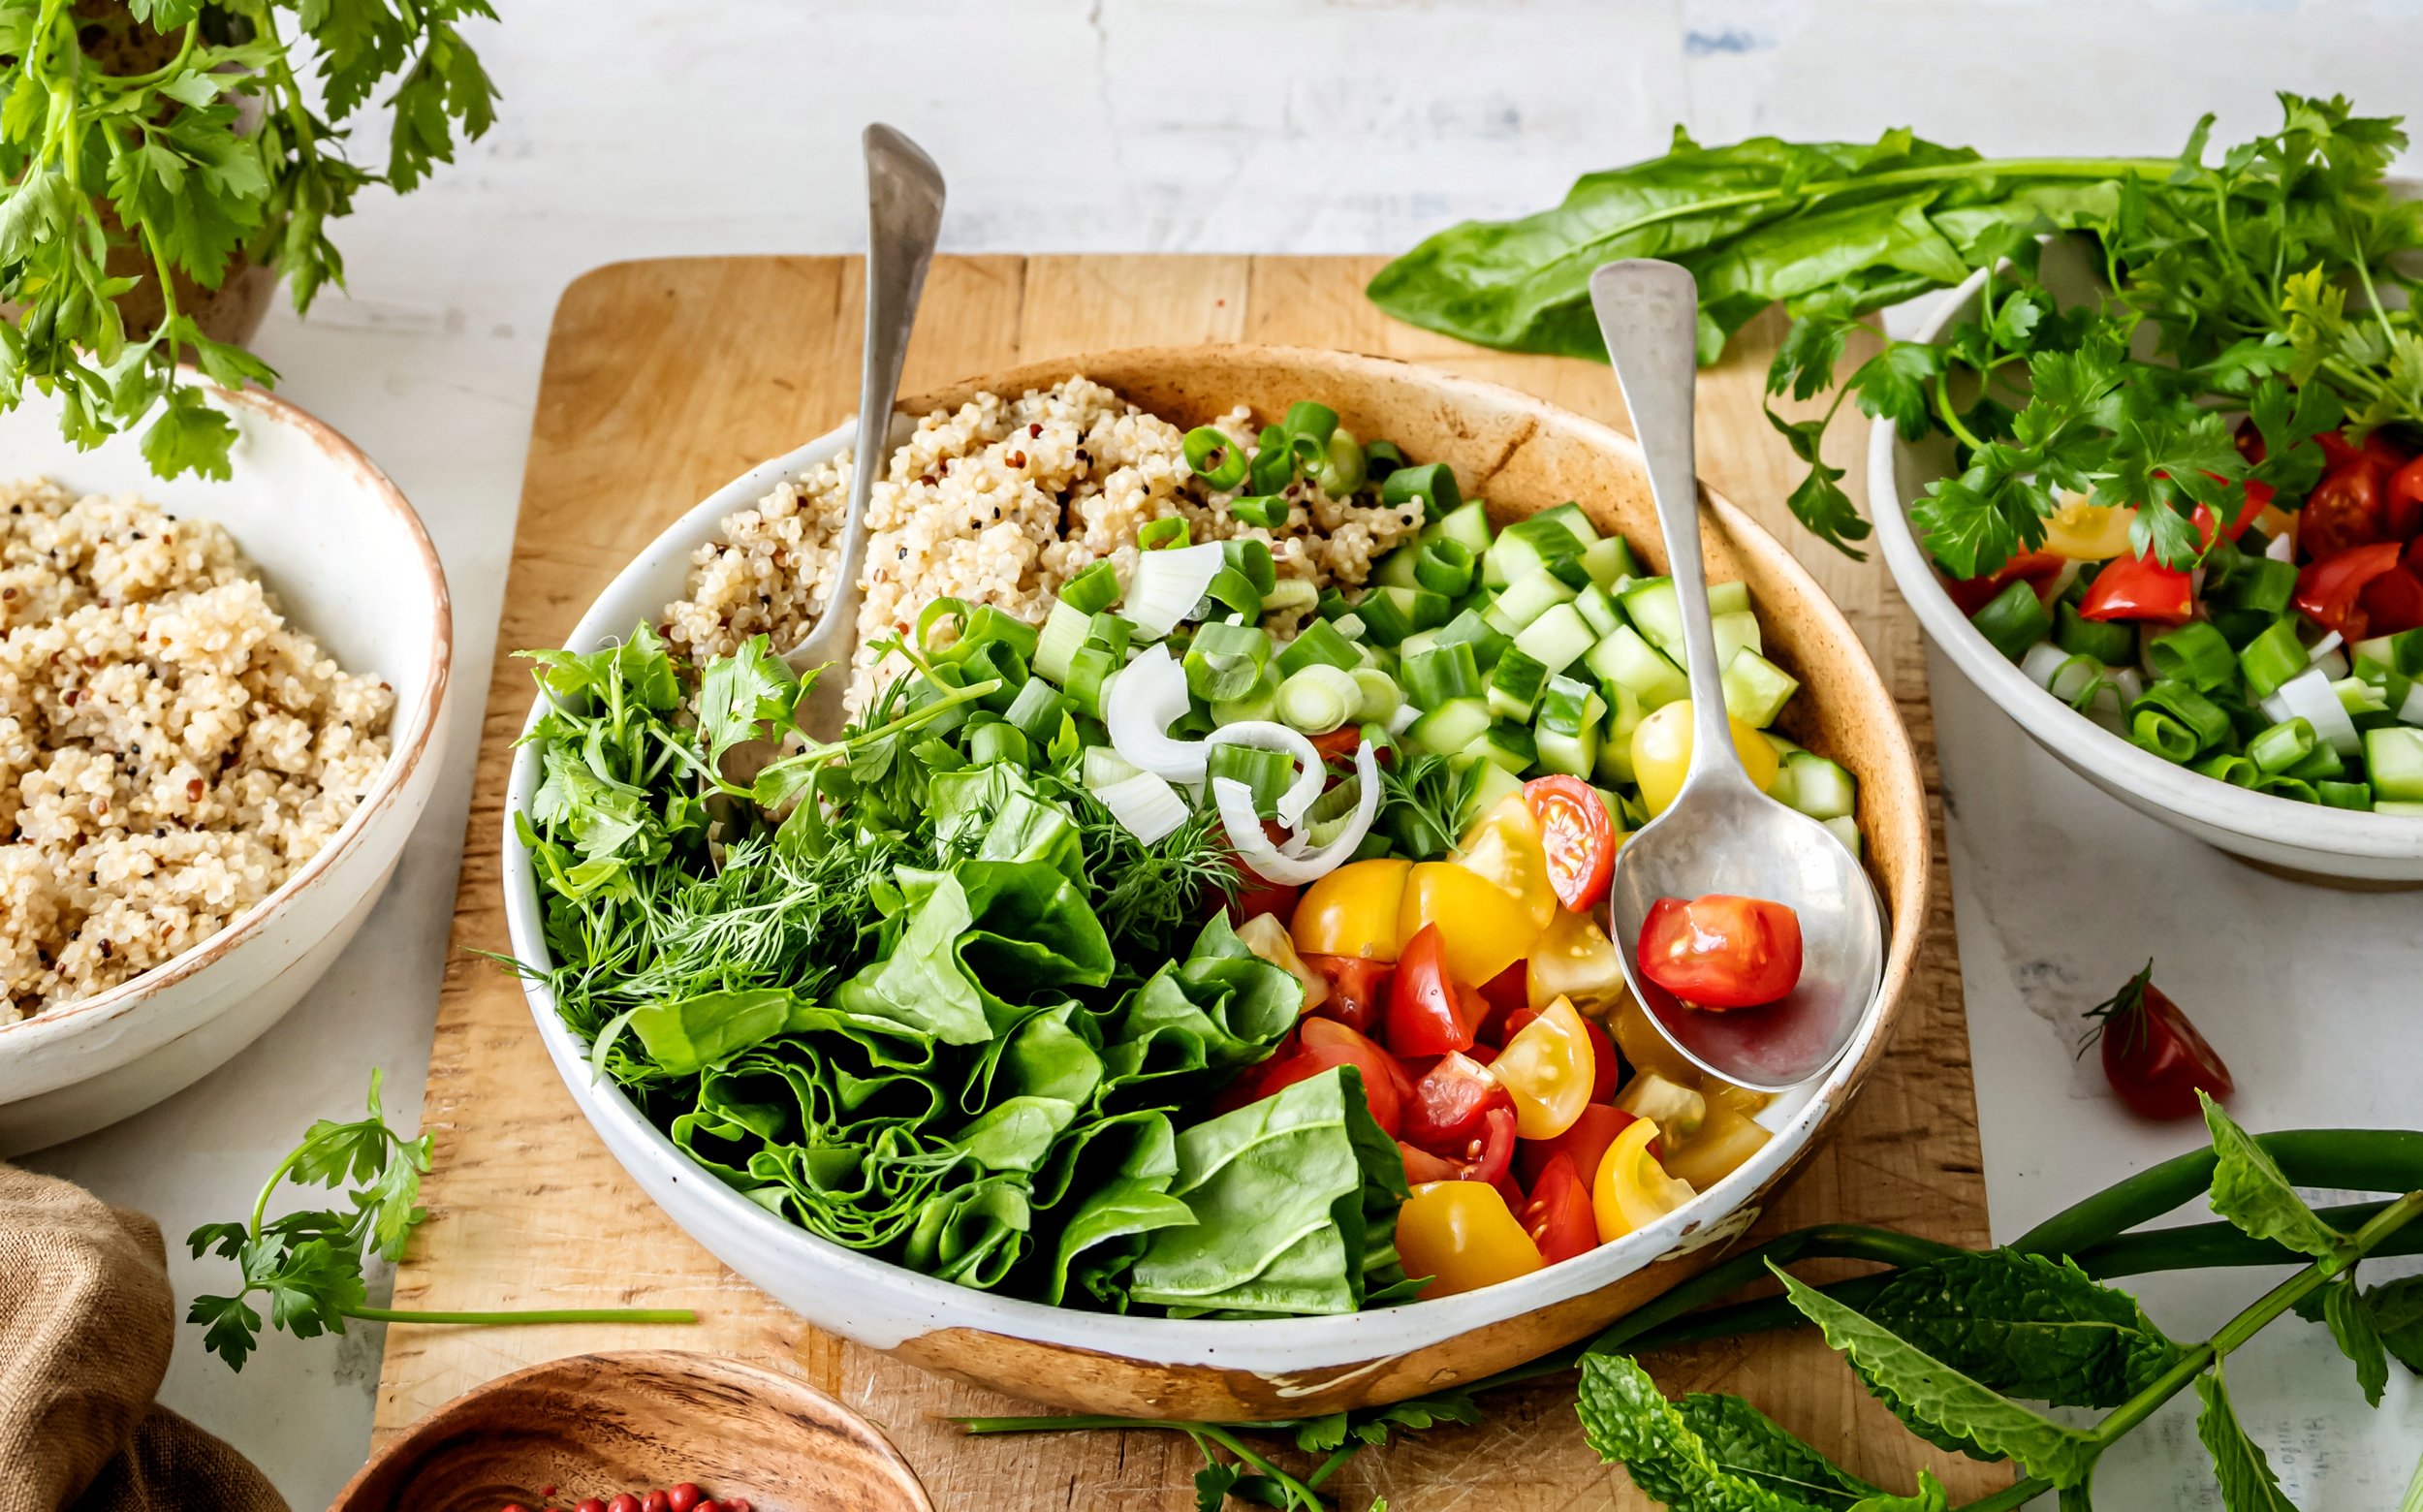
Mediterranean Quinoa Bowl…..a healthy combination of quinoa, roasted chickpeas, spinach, red onion, kalamata olives, hummus and feta cheese all drizzled in a lemon dressing and tzatziki sauce.

This dish is great for meal prep. You can prep all of the components in advance and have a delicious, filling meal in minutes! The quinoa should be cool or at room temperature when you toss this salad together. If it’s too warm, it will wilt the greens and fresh herbs. Instead of cooking it when you’re ready to assemble the salad, prepare it at least an hour and up to 2 days in advance.

Of course, flavorful toppings, sauces and dressings are always key components in our Tuesday Foods kitchen, so we have included our house-made recipes for classic hummus, vegan tzatziki sauce, and lemony vinaigrette. These can be made up to 2 days in advance, or you could use can store-bought if you are pinched for time.

Here’s how we do it…..

Mediterranean Bowl

Ingredients: 

Quinoa:

  • 3 cups cooked quinoa

Marinated Chickpeas:

  • 1 15 oz can chickpeas, drained, rinsed and patted dry

  • 1 teaspoon olive oil

  • 1 teaspoon lemon juice

  • 1/2 teaspoon oregano

  • 1/2 teaspoon garlic powder

  • 1/2 teaspoon salt

  • 1/4 teaspoon pepper

Bowl:

  • 4 cups baby spinach or arugula, loosely packed

  • 1 cup cucumber, chopped

  • 1 cup cherry tomatoes, chopped

  • 1/2 cup red onion, chopped

  • 1/2 cup feta cheese, crumbled (we like violife brand for vegan option)

  • 1/2 cup kalamata olives

Toppings:

Lemon Vinaigrette, for dressing

Hummus, for serving

Tzatziki Sauce, for drizzling

Fresh parsley, mint and basil, for serving


Instructions:

First: Preheat oven to 400°F and line a baking sheet with parchment paper. Prepare the quinoa, if you haven’t already.

Make the lemony vinaigrette dressing, and set aside.

Next, prepare the chickpeas: Add the chickpeas to a mixing bowl with oil and seasonings. Use your hands to coat the chickpeas well. Pour chickpeas onto a baking sheet. Bake for 20 minutes flipping halfway. Once cooked, set aside to cool.

To make the bowls: Add about 1/2 cup cooked quinoa, 1 cup greens, 1/4 cup cucumber, 1/4 cup tomatoes, 2 Tablespoons onion, 2 Tablespoons feta cheese, 1 Tablespoon kalamata olives, sprinkle of fresh herbs and a scoop of hummus to 4 bowls. Divide chickpeas evenly and add to bowls then drizzle with lemony vinaigrette dressing and dash tzatziki.

CHEF PREPARED, NUTRITIONIST APPROVED, HEALTHY MEALS MADE EASY.…

FROM OUR KITCHEN TO YOURS!

Good Clean Gazpacho

Gazpacho is the quintessential summer soup because all of the fresh ingredients are deliciously in season this time of year. Wonderful on warm evenings, when you don’t want to turn on the oven or stove to make dinner….Just prep your ingredients on a cutting board and let your blender do the rest of the work!

We love to make a little salad for the top of the gazpacho with fresh and sweet cherry tomatoes, a little diced red onion, parsley, olive oil and vinegar adds just the right amount of “extra love” to this recipe.

For the gazpacho:

3 lbs ripe heirloom tomatoes – use a variety of colors!
1 red bell pepper
1/2 of a green bell pepper
1/4 of a red onion
2 cloves of garlic
1 cucumber, peeled and roughly cut into chunks
2 tablespoons of red wine or sherry vinegar
1/2 cup of high quality olive oil
2 teaspoons salt (or to taste)
few grinds of black pepper


For salad garnish:

Make this salad right before eating to preserve the texture and flavor of the ingredients.

1 cup sliced cherry tomatoes
1 tablespoons diced red onion
1 tablespoon parsley, chopped
1 teaspoon olive oil
1/2 teaspoon red wine vinegar
big pinch of sea salt
grind of black pepper

Add all ingredients to your blender and blend until totally smooth and emulsified – at least 1 minute on high if not longer.

After blended, taste soup and add a little more salt or vinegar if desired. Move to the refrigerator to chill before serving for an hour or two. The flavors only get better as it sits!

Make the salad topping by mixing all ingredients together in a small bowl. Serve the soup in a bowl or cup, topped with a big scoop of tomato salad and an extra grind of black pepper.

CHEF PREPARED, NUTRITIONIST APPROVED, HEALTHY MEALS MADE EASY.…

FROM OUR KITCHEN TO YOURS!

Energizing Snacks For Long Hikes

5 Delicious Hiking Snacks For Long Lasting Energy

Hiking is one of our favorite forms of exercise here at Tuesday Foods. There’s nothing better than spending a day in the outdoors, breathing in fresh mountain air, getting some good exercise and being rewarded with an awesome view!

Eating the right combination of nutrients during hike is key to optimal energy and performance. The ideal snack will provide the perfect combination of nutrients: complex carbohydrates, protein, healthy fats, and a bit of sodium.

Here’s why:

  • Carbohydrates are the best way to get energy quickly! Complex carbs are what you’ll aim for because they have higher fiber content, making them digest more slowly and make you feel fuller longer. Complex carbs also help keep blood sugar more level, rather than spiking.

  • Protein will keep you full longer and help your muscles and tissues rebuild after your hike,

  • Healthy fats will keep you energized and satiated throughout your hike.

  • It might sound counterintuitive but sodium (an essential electrolyte) is important in keeping your body hydrated, especially during long and exhausting activities.

If you’ve ever wondered what snacks to take hiking, or you’re bored with protein bars and pretzels, read on for some fresh and healthy Tuesday Foods ideas!

Not only do these hiking snacks hold up well in your backpack as you hike, but they also taste delicious and will keep you energized on the trail.


Sandwiches and Wraps

These are perfect sustenance for all day hikes. . Avoid making wraps with soft cheeses, mayo, and egg unless you are going to be eating them right away, because they won’t be refrigerated for a while.

We pack hearty our wraps or sandwiches for the trail in a reusable bag and use a stainless steel sandwich box to protect softer items from getting smooshed.

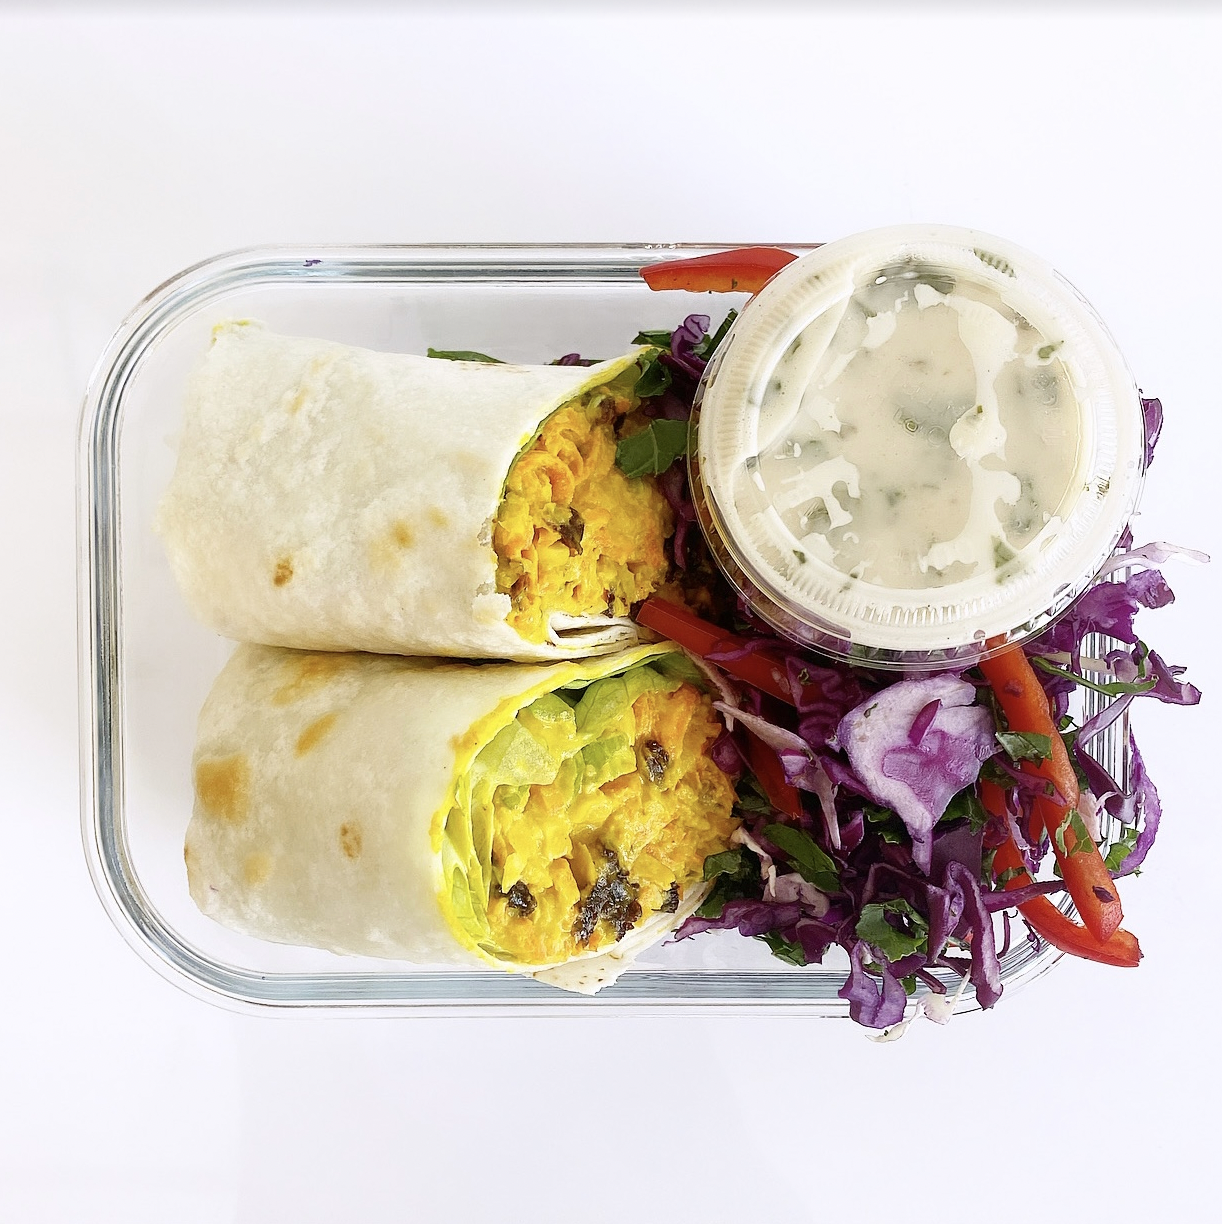
Vegan “Chick-un” Wrap:

Chickpea salad:

  • 2 15 oz cans chickpeas drained and rinsed and then food processed. (rough chopped - but not fully mushed like hummus.)

  • 3 carrots shredded

  • 1/2 cup celery sliced - thin half moons

  • 1/4 cup scallions/green onions sliced

  • 1/2 cups dried currants

  • 1/2 cups cashews raw, rough chop

  • 4 tortillas to wrap (We use Sana coconut wraps for a gluten free option)

Chickpea Salad Dressing:

  • 1/2 cup tahini

  • 1 lemon juiced

  • 1/2 cup warm water to thin dressing

  • 2 cloves garlic finely minced

  • 1-2 tbsp maple syrup

  • 1 tbsp yellow curry powder

  • 1 tbsp freshly grated ginger

  • 1/4 tsp ground turmeric

  • 1 tsp salt (more to taste)

  • Freshly ground black pepper to taste

Instructions:

Make the dressing: In a blender combine all dressing ingredients and blend until combined. Set aside.

Process chickpeas: In a food processor, process chickpeas in batches so that they are partially mashed, leaving some whole.

Assemble: Add in the carrots, scallions, raisins, cashews, and pour dressing overtop and mix well to combine. Taste for flavor adding salt and pepper to taste.

Wrap: Warm tortillas on a pan, lay on cutting board and place 2 pieces of butter lettuce on top. Scoop three half-cup scoops onto butter lettuce. Fold in sides and wrap into a burrito. Cut diagonally.

Or - Keep it super simple with the classic endurance fuel!

PB and J Sandwich:

  • 2 slices sprouted-grain bread, or your favorite healthy bread, toasted if you like

  • Or tortillas

  • 2 tablespoons peanut butter or almond butter

  • 2 tablespoons fruit-sweetened jam


Nuts and Fruit

It's called trail mix for a reason - It’s easy to eat, it provides a nice variety of textures and flavors (crunchy, chewy, salty, sweet), and that combination of nutrients should help with energy throughout the day. Granola bars and date balls can also get the job done. Nosh on these mid-morning or in the afternoon to keep you going.


Tuesday Trail Mix:

  • 3/4 cup shelled roasted salted pistachios

  • 1/2 cup toasted salted pepitas

  • 1/4 cup roasted cashews

  • 1/4 cup cacao nibs

  • 1/3 cup dried tart cherries (look for dried cherries with no sugar added)

  • 1/3 cup dried mulberries

  • 1/3 cup vegan and refined-sugar-free dark chocolate chips (We like Hu Chocolate’s Gems)

  • 1/4 teaspoon cardamom

  • a pinch of flaky salt


Combine all ingredients in a large bowl and toss well so the cardamom and salt get evenly distributed.

Sweet Treats

Date Balls:

Dates are one of our favorite snacks on the trail and is an ingredient in many snack bars both in the store and in our Tuesday Foods recipes. Dates are not only super sweet, satisfying and yummy, they have fiber, iron, calcium, potassium, magnesium, vitamin A, K and a some B's too.

Ingredients

  •     1 cup about 10 Medjool dates, pitted

  •     1/2 cup raw nuts, cashews, walnuts, almonds, pecans, etc.

  •     pinch of sea salt

Instructions:

Process: Add dates, nuts and salt in a food processor fitted with the S-shaped blade. Process until mixture is well combined and sticking together.

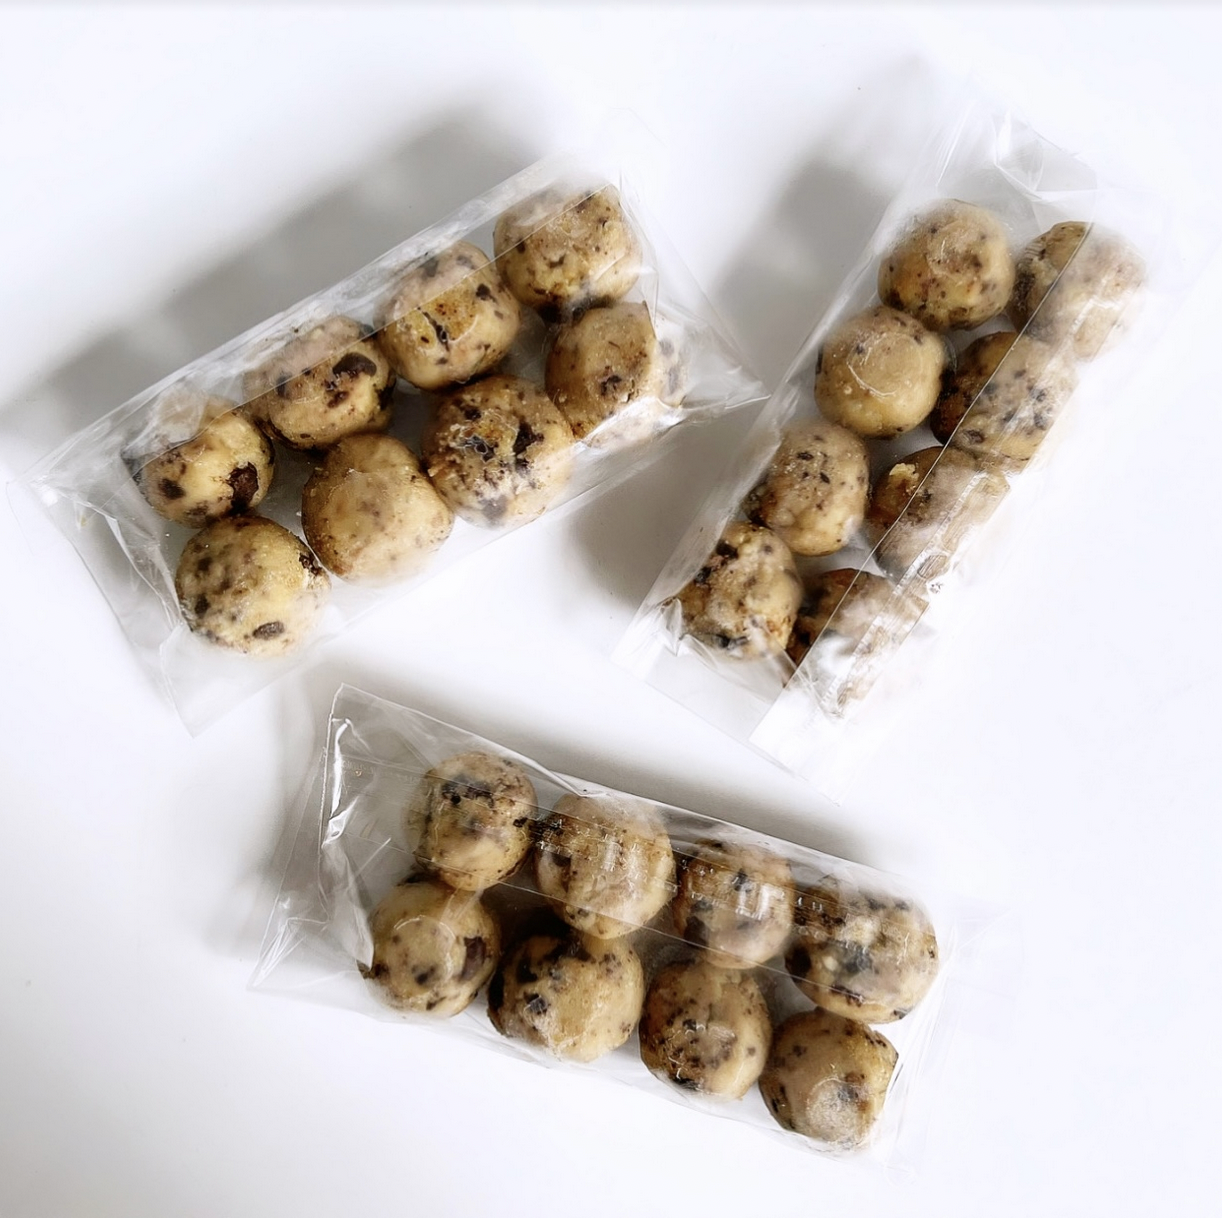
Form balls: Scoop dough from food processor with your hands (or a cookie scoop) and form into small balls using your hands. Enjoy right away or store for later.

To store: Place balls into a sealed storage container and store in the fridge for a few days or in the freezer for a month

Peanut Butter Energy Balls

Ingredients

  • 2/3 cup creamy peanut butter

  • 1/2 cup mini chocolate chips

  • 1 cup old fashioned oats

  • 1/2 cup ground flax seeds

  • 2 tablespoons honey or maple syrup

Instructions
Combine all 5 ingredients in a medium bowl. Stir to combine. Place in the refrigerator for 15-30 minutes so they are easier to roll.


CHEF PREPARED, NUTRITIONIST APPROVED, HEALTHY MEALS MADE EASY.…

FROM OUR KITCHEN TO YOURS!

Fabulous Figs, 3 Ways
Screen Shot 2021-08-25 at 12.22.13 PM.png


Fresh figs - the season has just begun!

Fresh figs are a seasonal delight - they are sweet, with a rich flavor and a soft, “jammy” texture. In addition to their unique taste, figs are packed with nutritional benefits for the body. They’re an excellent source of soluble fiber, thanks to all of those seeds within the fruit. Figs are also rich in vitamins A, B1, B2, C, manganese, potassium, magnesium, copper, iron, and phosphorus.

They taste SO GOOD with everyday ingredients, so we thought we would share a few of our favorite ways to eat them. All three of these recipes are easy to prepare, absolutely DELICIOUS, and don’t require any cooking!

Fig + Nectarine Salad

Screen Shot 2021-08-25 at 1.42.08 PM.png

Ingredients:

Salad:

  • 5 cups spinach (arugula also works well)

  • 1 cup fresh figs, sliced

  • 1 cup fresh nectarines, sliced

  • 1/4 cup pinenuts, toasted

Dressing:

  • 2 tablespoons balsamic vinegar

  • 2 tablespoons olive oil

  • 1 teaspoon Dijon mustard

  • 1 teaspoon maple syrup

  • salt and pepper to taste

Instructions:

  1. Rinse and slice the figs and nectarines

  2. Heat a nonstick pan over medium heat. Add the pine nuts and toss until they’re a light brown color. (Careful not to burn!) Set aside to cool.

  3. Whisk all dressing ingredients together. Combine salad ingredients in a serving bowl. Drizzle with the dressing and serve immediately.

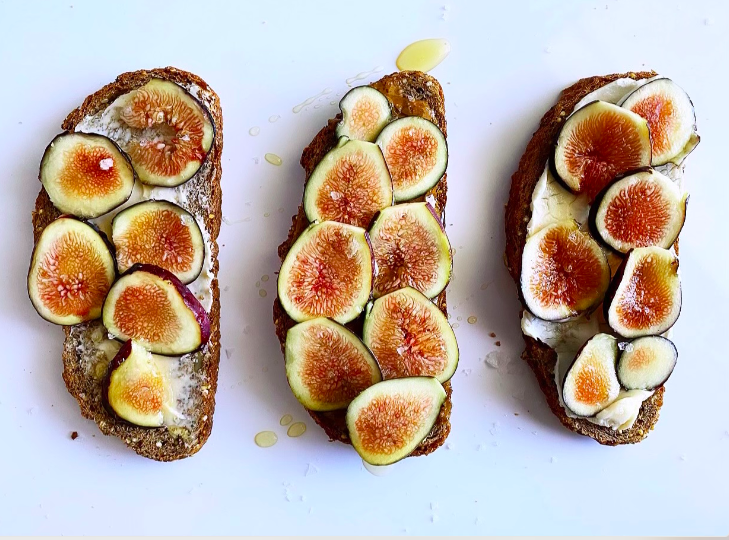
Fig Toast

Screen Shot 2021-08-25 at 1.42.55 PM.png

Ingredients:

  • 2-3 figs

  • 1 slice of sourdough toast, or toasted bread of your choice

  • ricotta cheese or cream cheese (our favorite vegan options noted below!)

  • drizzle of honey

  • sprinkle of sea salt

  • optional: microgreens or arugula, for topping

Instructions:

  1. Pop your bread in the toaster and toast to your desired level. Slice the figs.

  2. Spread the vegan cream cheese or ricotta on the toast, then place the sliced figs on top.

  3. Drizzle over some honey and a sprinkle of sea salt. Top with microgreens or arugula, if using

Notes:
Vegan cream cheeses that we recommend - so many good ones! Kitehill, Myokos or Violife

Chocolate Dipped Figs

Screen Shot 2021-08-25 at 2.50.12 PM.png

Ingredients:

  • 12 figs washed and sliced in half lengthwise

  • 4 oz melted dark chocolate, melted (We love Hu Chunks)

  • Flaky salt

Instructions:

  1. Wash figs and slice in half lengthwise.

  2. Melt dark chocolate in microwave in 15-20 second increments, stirring well each time.

  3. Dip each fig half in chocolate and place on a tray lined with parchment paper.

  4. Sprinkle with sea salt and put tray in refrigerator for about 30 minutes to let chocolate harden.

Enjoy immediately or store in airtight container in fridge for 3-4 days.

CHEF PREPARED, NUTRITIONIST APPROVED, HEALTHY MEALS MADE EASY.…

FROM OUR KITCHEN TO YOURS!

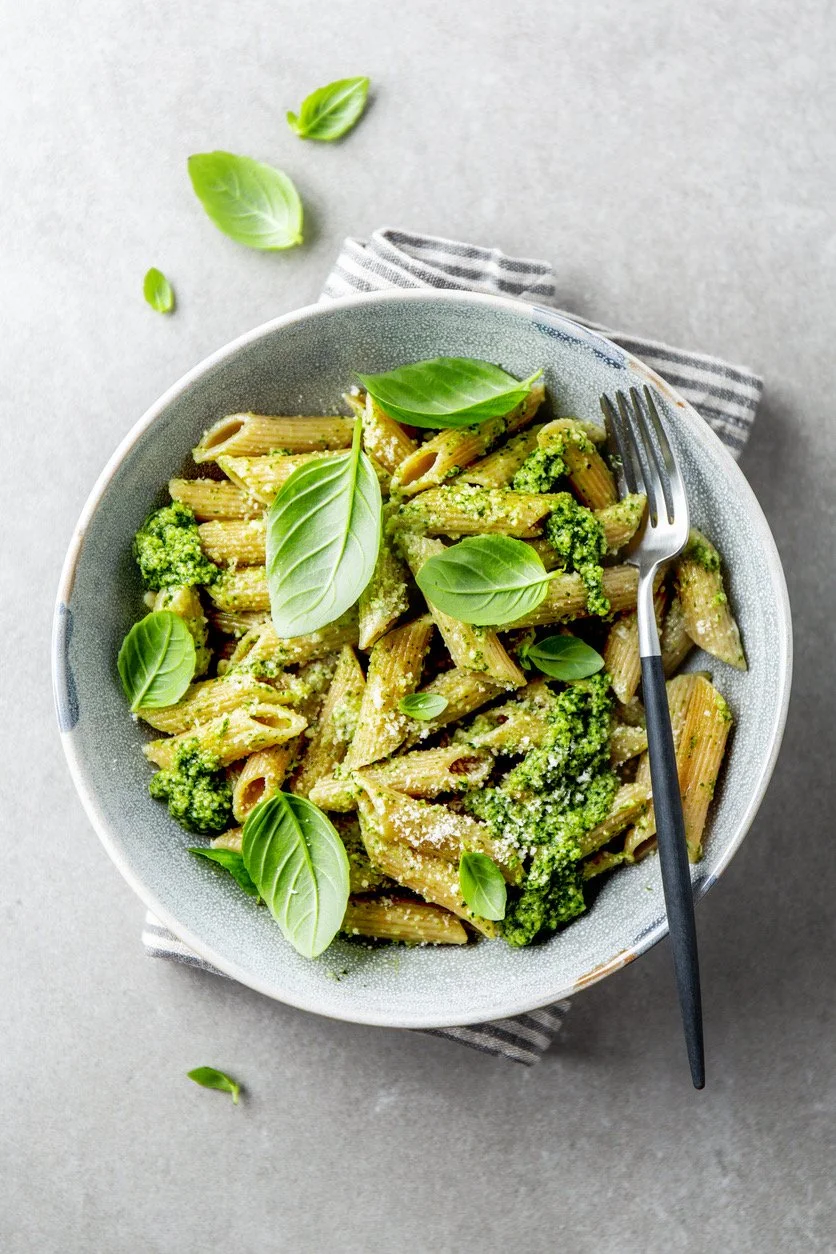
Broccoli Pesto Pasta

This recipe comes from The Secret Ingredient Cookbook by Kelly Senyei.

A delicious pesto made from broccoli and green olives—who would have thought?

We probably wouldn't have come up with this combination ourselves - so we are so glad our yogi friend, healthy home cook, and one of our favorite writers, Ali Margo, brought it to our attention!   The recipe comes from Kelly Senyei’s new cookbook, The Secret Ingredient Cookbook.

And we have to admit - we LOVE secret ingredients!  Especially the ones that bring an unexpected and delightful surprise to a dish. That’s the idea behind The Secret Ingredient Cookbook and this Broccoli Pesto Pasta.

As it turns out, this pesto is hiding more than one secret ingredient: Green olives contribute both a bright green color and briny, salty flavor, while broccoli adds a power house of nutrition - vitamin C, B6, magnesium and protein.

The pasta can be served warm, room temp or chilled, making it a year-round winner. Use as much of the pesto as you like, and save any leftovers for later.   The pesto keeps well in the fridge, and makes a great dip for veggies or crackers.

Broccoli Pesto Pasta

Ingredients

  • 2 cups broccoli, cut into florets

  • 1 lb. uncooked pasta, rigatoni or penne

  • 3 Tbsp. pine nuts

  • 1 cup green olives, pitted

  • 2 cups fresh basil leaves

  • 3 cloves garlic, roughly chopped

  • 3 Tbsp. Parmesan cheese, freshly grated (we like violife for vegan option)

  • 1/4 tsp. black pepper, plus extra for seasoning

  • 1/4 cup extra-virgin olive oil

  • kosher salt, for seasoning

  • Optional add-ons: sprinkle of red-pepper flakes, drizzle of olive oil, roasted or steamed broccoli florets

Instructions

  1. Bring a large pot of salted water to a rapid boil. Add the broccoli florets and cook for one minute. Transfer the broccoli to a food processor or blender with a slotted spoon.

  2. Bring the water back to a boil and add the pasta, cooking until al dente according to package directions. Drain the pasta, reserving one cup of the pasta water in a measuring cup.

  3. In a small saucepan, cook the pine nuts over medium heat until toasted and fragrant, about 3 minutes.

  4. Add the pine nuts to the food processor or blender along with the olives, basil, garlic, cheese, pepper and 1/2 cup of the reserved pasta water. Pulse until well combined.

  5. With the processor on, add the olive oil slowly, stopping to scrape the sides as needed, until the pesto is pureed. Season with salt and pepper to taste.

  6. In a large bowl, toss the pasta with a desired amount of the pesto, thinning with extra pasta water two tablespoons at a time as needed. Serve.


CHEF PREPARED, NUTRITIONIST APPROVED, HEALTHY MEALS MADE EASY.…

FROM OUR KITCHEN TO YOURS!